Setup Amazon ECS and Run Container using Amazon Fargate — Deploy to AWS ECS Fargate with Load Balancer (Part 3)

Once we have pushed our docker image to Amazon ECR (Please follow my articles Part 1 and Part 2 if you have not yet), the docker images can now be used to deploy in different kinds of environments such as QA, UAT, staging and production. In order to run these docker images and manage the containers, we would need some kind of container management or orchestration platforms such as Kubernetes, Docker Swarm, Mesos. AWS provides services like Elastic Container Service (ECS), Elastic Kubernetes Service (EKS) to manage containers and Fargate to run containers.
Amazon ECS is a fully managed container orchestration service that helps you easily deploy, manage, and scale containerized applications. It deeply integrates with the rest of the AWS platform to provide a secure and easy-to-use solution for running container workloads in the cloud.
AWS Fargate is a serverless, pay-as-you-go compute engine that you can use with Amazon ECS and Amazon EKS to run containers without having to manage servers or clusters of Amazon EC2 instances. So, when you run your Amazon ECS tasks and services with the Fargate launch type or a Fargate capacity provider, you package your application in containers, specify the Operating System, CPU and memory requirements, define networking and IAM policies, and launch the application. Each Fargate task has its own isolation boundary and does not share the underlying kernel, CPU resources, memory resources, or elastic network interface with another task.
Setting up Amazon ECS cluster
Amazon ECS cluster is a logical grouping of tasks or services. Your tasks and services are run on infrastructure that is registered to a cluster.
- Login to AWS console and search for ECS.
- Click on Create Cluster, select Networking only cluster template and click Next step.

Since we are going setup ECS with Fargate, we will select Networking Only cluster template.
3. Enter cluster name and select Create a new VPC for this cluster (Optional). This will show CIDR block and subnets that will be created along with ECS cluster. Then, you can add Tags if necessary. It is better to enable CloudWatch Container Insight as we will have ability to see logs for any kind of errors.

4. Click on Create button. It will spin up your cluster.

Configure Task and Container Definition
- Navigate to Task Definitions page from side-nav bar and click on Create new Task Definition.
- Since we are setting up ECS with Fargate, select Fargate launch type and click Next step.
- Here, we are configuring task and container definition. Enter Task definition name and leave Task role and Network mode as it is. Select Operating system family based on your preference and application.
- For Task Execution IAM role, leave as it is.

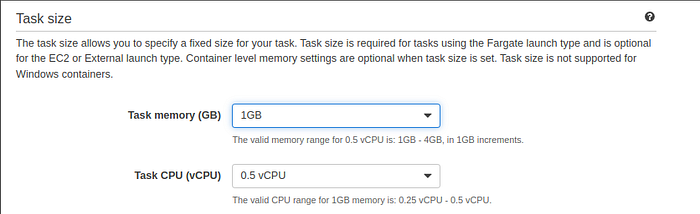
5. In Task size section, select the desired memory and vCPU. For this demo, I will select 1 GB Task memory and 0.5vCPU Task CPU.
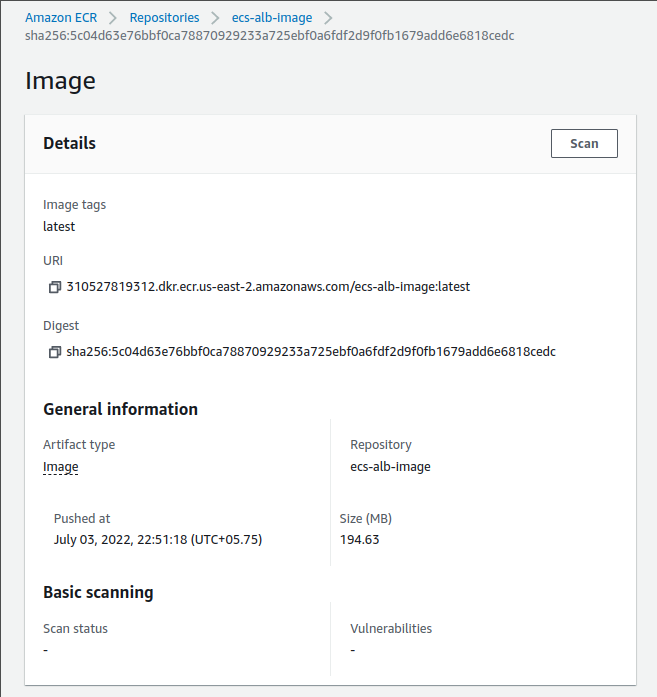
6. In Container Definition section, click on Add Container button. In this form, we will mention the desired container name, link of docker image that we want to launch. Copy URI from ECR Repository.
7. Select Memory Limits based on your requirements. However, it can not be greater than allocated Task Memory. Here, I am allocating 1024 MB soft limit.
8. In port mapping for ease, we will mention the port that our application will be running on. Refer to your dockerfile EXPOSE command. In my case, it’s 8000 [line 22].

In case you want CloudWatch logs, you can enable Auto-configure CloudWatch Logs in Advanced container configuration. Lastly, click Add.
9. For now, we can ignore Service Integration, Proxy Configuration, Log Router Integration and Volumes. You can add Tags to the task definition.
Now click on Create button to create a Task Definition.

Configure Service
- Navigate back to your cluster and under Services tab, click on Create button to add service to the cluster.
- Select Fargate launch type. Next select the task definition we just created and latest revision and select your created cluster.
- Enter Service Name. Next, enter number of tasks based on the minimum number of Fargate instances you want up all the time. For example, if you setup it up to 20 then it will always have 20 instances up. You can setup auto scaling to increase and decrease the instances but the instances count can not be less than this value. So, set the minimum value you would want the instances to be up all the time. Here, I set 2 number of tasks.

4. Click Next step.
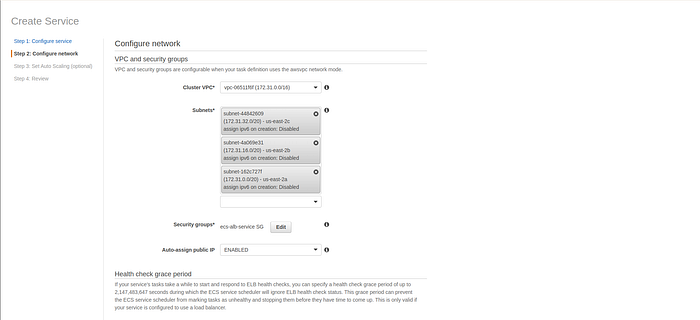
5. In Network Configuration, select Cluster VPC and subnets .
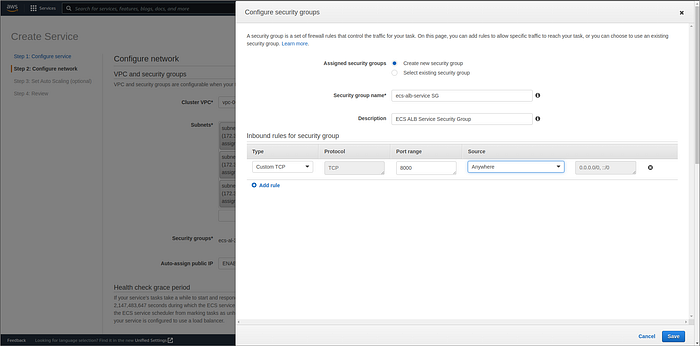
Edit Security Group, name security group and update Inbound Rules. Select Custom TCP in type, input Port, same one that you mentioned in Port Mapping while configuring Container Definition and select source Anywhere. Click on Save button.
Enable Auto-assign public IP so that we can access via IP.
6. Leave the other settings as it is and click Next Step.
7. Skip Set Auto Scaling and click Next step.
8. Review Service configuration and click Create Service.
9. Click on View Service and go to service details. There you can see, your service will start tasks based on number of tasks you entered while configuring service.
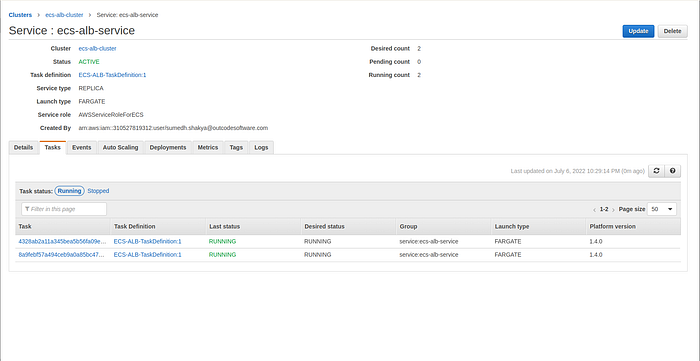
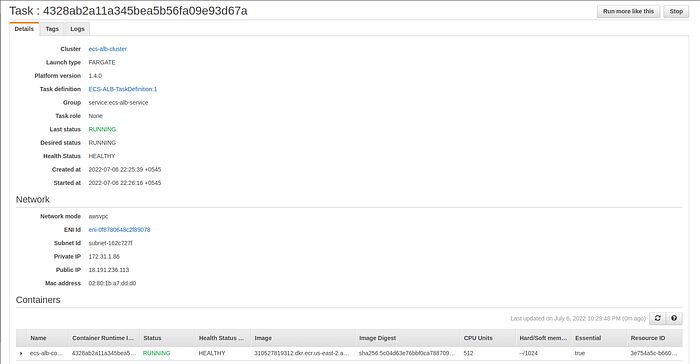
Here is the details of a task running under the service with public IP of running container in Network section.
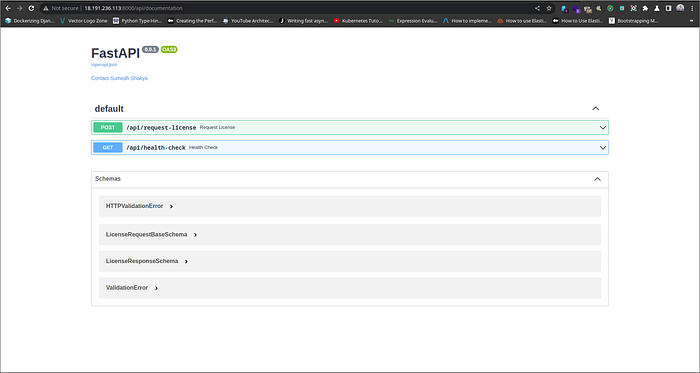
You can confirm your backend server running by going to http://Task_Public_IP:Port, in my case it’s http://18.191.236.113:8000/api/documentation, where /api/documentation is API documentation page provided by FastAPI itself.
Congratulations, you have now successfully configured task definition, container definition and service, registered them to ECS cluster and run docker image from ECR with Fargate.
Follow my next article, to setup application load balancer and point it to your ECS.
If you have any suggestions for improvements or some better way to enhance, feel free to comment below or send me an email at sumedhshakya11@gmail.com
Thanks for reading! Hope this was helpful.